|
Version: I used
PI 8
 Level: Intermediate Level: Intermediate
Featured Tools: Path
Edit, "Frame &
Shadow"
Supplies: The
Dover image and shape I used are here.
PhotoImpact's
Frame & Shadow dialog can easily combine
complex path objects with speed and convenience
unavailable to the Path Tool's "Continue Draw"--and
the result is a path object that is editable (with
the Path Tool of course ;-)
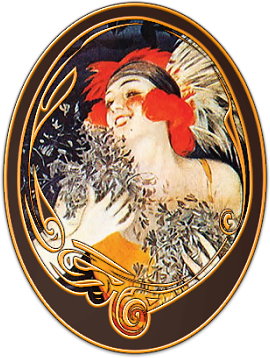
This tutorial describes how
to make the black and gold frame shown here.
It's a combination of a path circle and a
converted dingbat text "frame."
M/C
= main click
O/C = other click (brings up the
context menu)
- Paths used for this technique must be solid
in the center in order to cut out an area for
displaying a picture, so here's how to prepare
the dingbat supplied (from the free font "KR
Ringlets"). Some elaborate dings can't be
made suitable for this operation but this one
works.
- Open the ding-path in PI. Since text
objects don't travel well without their parent
fonts,I've already converted it to a path for
you (with O/C > Convert Object Type> From
Text/Image to Path)
- Click on the Path Tool then click "Editing"
on its Attribute bar:
- First thing you see (zoomed-in).
Yikes eh? but not a problem for what
little needs to be done '-)
- Click on the ding's background to
deselect all of its paths (nodes
disappear)
- Run your cursor over the innermost path line
and click down to select it when you see the
pointing finger (nodes reappear); hit your
delete key
- Click out of Editing mode.
- The center of the ding-path is solid and you
now have a frame-making shape:
- Drag and drop the edited path into your
personal EasyPalette shape
library.
- Open a new canvas, true color, white,
300x400 pixels
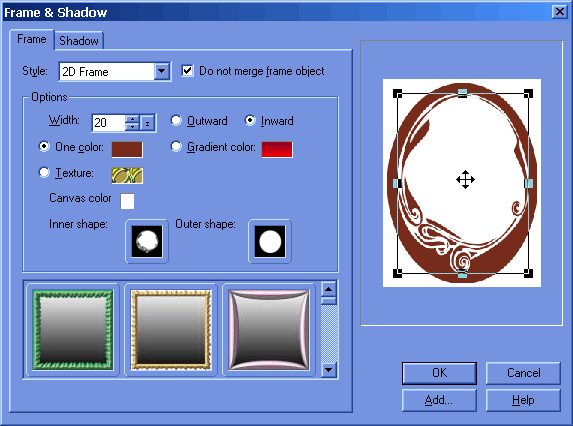
- Format > Frame & Shadow (or
Shift+F)
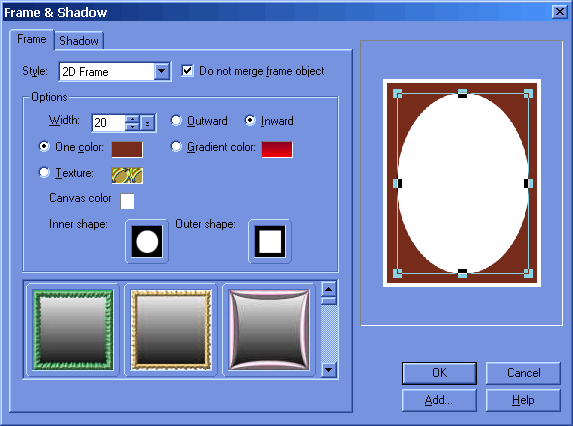
- On the Shadow Tab: be sure
shadow is unchecked
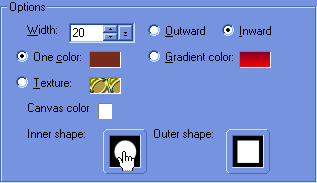
- On the Frame Tab:
- Style: 2D Frame; "Do not merge frame
object" = checked
- Options: Width: 20 (for now); Inward;
One color = something dark; Canvas color =
white
- Click in the "Inner shape" box:
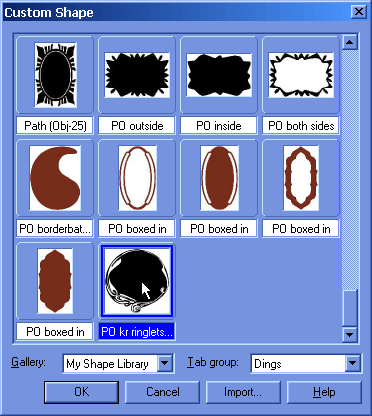
- The following dialog opens. Navigate
with the dialog's drop-down lists to find your
personal shape library and select the ding-path
you just made. Click OK.
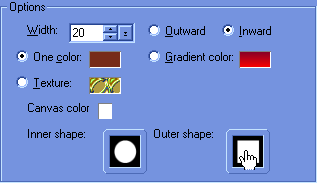
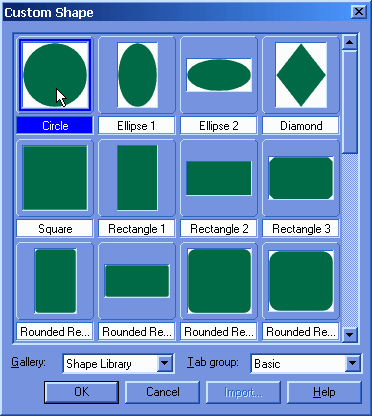
- Now click the "Outer shape" box.
- When the dialog opens choose:
- Gallery: PI's Shape Library
- Tab group: Basic
- Click on Circle
- Click OK
- Change the Width option now if you
want. This setting only adjusts the width
of the Inner shape. You can also
use your cursor in the small preview to move the
Inner shape around or to change its dimensions
vertically and/or horizontally with the
handles. For this frame leave the
dimensions as they are.
- You can now click "Add" if you'd like to put
the frame's settings into your
EasyPalette Gallery. This will
create a shortcut that will automatically apply
your frame to an image in the same manner
Ulead's pre-set frames apply. (Be
aware that this EP option can make
misshapen frames as easily as Ulead's
pre-sets due to varying aspect ratios.)
-
Click OK to exit the Frame &
Shadow dialog.
Inserting the
Image:
You now have a frame-shaped
path object (made from two combined path shapes)
on your canvas that you can drag and drop into an
EP Library for repeated
use if you want. Here's an easy way to
manually crop an image to fit this particular
frame:
- Open the Dover image and copy it to the
clipboard (Edit > Copy) (if you use a
different image, be sure it's big enough to fill
the space inside the frame).
- Deselect the frame object (O/C > Deselect
All Objects)
- Since the inside of this frame is too"busy"
to select accurately, use the Magic Wand (Search
connected pixels = checked, Similarity = 0,
Antialias = checked) to select the white area
outside the frame.
- O/C > Expand/Shrink: Expand = 2
pixels; Keep original soft edge = checked;
Circle
- O/C > Invert
- Edit > Paste > Into Selection
- Now--without clicking
down--move your cursor around until your
image is where you want it inside the selection,
then click the mouse. Voila! . . .
your image is positioned, cropped, and converted
to an object :-))
- Click on the frame to activate it and apply
a preset from the EP, or perhaps open the Path
Tool and its Material dialog to add bevel,
color, lighting, etc. to suit.
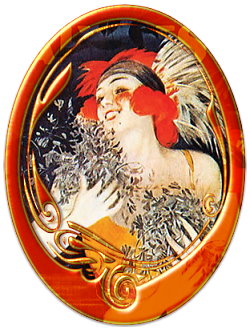 I applied the gold-edged
black preset from my Borderlines
4 to the frame in the header. Here
I've decorated it with a 2-D yellow-bordered
orange preset then Any Shaped beveled and duplicated,
filling the dupe with the large Dover image then
merging it over the original frame using the "Soft
Light" method.
Tips:
- If you've used the transform handles to
adjust the width/height of your frame, click the
first of PI's preset thumbnails in the Frame
& Shadow dialog to reset them before you
attempt to make another.
- You can put lots of PI's default shapes to
use for both the Inner and Outer frame
shapes. Using the same shape for both
aspects can make great frames too :-)
- Warning:
Making these frames is addictive--especially
when you're playing with dingbats '-)
Be creative! Have fun!
Help is
just a click away (on my sig) if you need it.

|
Please feel free to save this page to your
hard drive for future
reference. | |