 Make cutouts so slick they
rival Paint Shop Pro's . . . | |||||
 Version: I used PI 8 Version: I used PI 8Skill Level:
Intermediate
NB:
O/C (other-click) refers to whichever
mouse-button you use to bring up context menus. This method will definitely not provide the
nearly instant (albeit very dubious) gratification of the Magic Wand
because making clean cutouts with PI calls for the same
amount of determination, persistence, and patience as "tubing" with
PSP. But if having image objects sans lumpy, jagged, or
hazy edges or off-colored pixels buried deep in corners sounds
appealing, then read on!
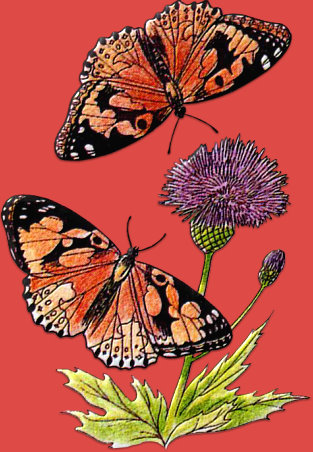
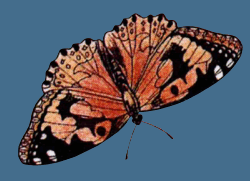
I chose the top butterfly image here to
start you clean-cutting because it has a fairly distinct dark edge
next to a solid-colored background (and also a small
challenge). Not all the pictures you'll want to cut out will
be this easy: some will need a loose Lasso selection instead
of the Magic Wand to extricate the image from its surroundings; lots
will not have neatly outlined edges; and others will require
touch-up or even repairing. Once you get the drift though,
this simple technique will enable you to cut out even tiny pictures
(think "Dover samples" and have a look here'-) without leaving stray pixels or creating
deformities or "halos."
My appreciation and thanks to all who've
gone before and freely offered experience and suggestions--including
PSP's master tuber 'Jazzl' and whomever it was wrote the "Modesto"
tutorial that finally jogged my inner eye into seeing the way to get
to where I've always been wanting to go. Here's how you can
get there too: | |||||
|
1) Open the butterfly in
PI. Just in case you need to put this process on hold before
you're finished, now is an opportune time to save the image
somewhere as a UFO.
2) Click the Magic wand and
set:
Similarity = 20 Search connected pixels = checked then click in the white space around the butterfly (this selection does not need to fit tightly). 3) O/C > Invert. |
  | ||||
|
4) Click on the Mask icon.
 The pixels you need to remove from
the edges of the butterfly are now very obvious :-)) The pixels you need to remove from
the edges of the butterfly are now very obvious :-))If the mask color is not to your liking or a good contrast,
click: File > Preferences > General tab, and change
it. I'm using blue #446D8C with a transparency of 0.  Be sure your
background color is black and your foreground color is
white. Be sure your
background color is black and your foreground color is
white. |
 | ||||
|
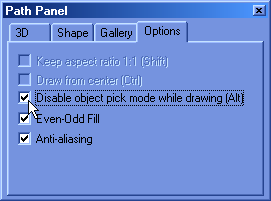
5) Now click the Path
tool. Set: Shape = Bezier/Polygon
Mode = Selection (color doesn't matter).
Open the Path Panel, Options tab and check "Disable pick mode
while drawing." Be sure "Anti-aliasing" is checked also.
Close the panel to get it out of your way.
NB: Remember to re-enable the
pick in this panel after you've finished making your "tube."
The disabled pick option will hold for all other tools with the
option throughout your entire session (in PI 8 at least). This
can cause consternation! |
  | ||||
|
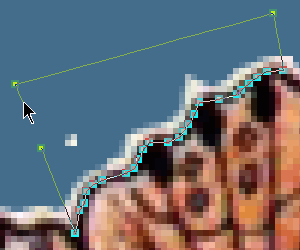
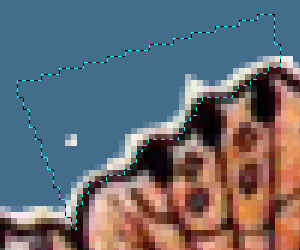
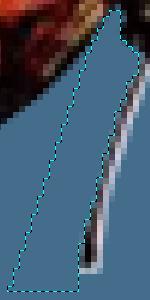
6) Zoom the butterfly in to
about 600% (I made a Quick Command Task for this zooming operation
so I could easily move back and forth from normal- to 600%
zoomed-in-view). Click on the mask near the edge of the image
then start clicking on the solidly colored dark pixels on the
edge of the butterfly--the more curved and uneven the edge, the
smaller the steps (don't worry--you're not making a path object
here, you're just making a selection). After a short distance,
move the cursor away from the image back out onto the mask, click
around to make a box, then double-click to close the
selection. |
 | ||||
|
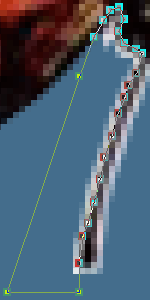
7) If you're satisfied the
selection is positioned so all the pixels in the area that need
removing are inside of it, go on to step 8. If you see areas
that need adjustments, click Editing on the path tool's Attribute
bar and move, add, or delete nodes. Believe me, it's much
easier to edit a path selection than it is a Lasso selection--and
the edges of the path selection will be smoother (my thanks to
Hillie for that great observation :-))) Click out of Editing
and proceed. |
 | ||||
|
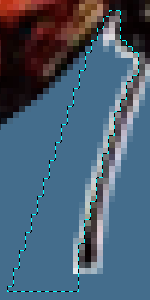
8) Hit the Delete key on your
keyboard once or twice at most (each time you delete the edge of the
butterfly gets harder) and the off-color edge pixels will vanish
behind the mask. You can O/C > None to clear the selection
and get a better look at the new edge--but because you've disabled
pick mode, leaving the selection in place will not interfere with
making the next. Continue in this manner selecting and
deleting small discolored segments of the edge all the way
around. When you get to the antennae... |
 | ||||
|
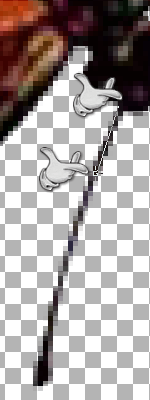
9) ...just do one side of each
at a time. If the antennae look a bit thin afterwards not to
worry--a way to plump them up follows. | |||||
| |||||
| |||||
|
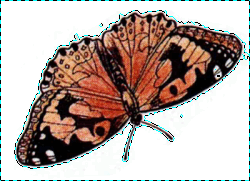
12) Edit >
Copy; Edit > Paste > As new image (actual size,
background hidden). 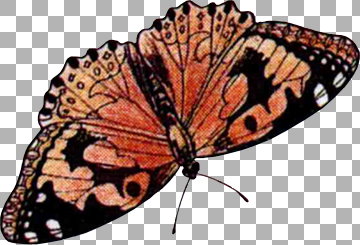 | |||||
|
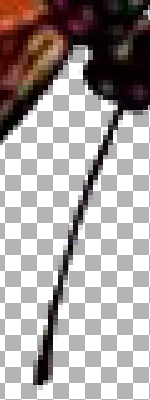
13) Touching Up:
To thicken and darken the antennae, click the Paintbrush: Shape = round
Size = 1
Color = #080206 (chosen from
the edge of the image)
Trans = 0
Soft edge = 1
Lines = Straight Lines
Mode = Paint as object
Zoom in and draw a series of short lines along and over the
antennae, starting each new line where the last ended. Click
out of Object mode; O/C > Select all objects; O/C > Combine
Objects. |
| ||||
|
Alternately, simply paint over the thin lines to darken the
semi-transparent light gray pixels. You can do this around the
edge of the butterfly too wherever you see any hint of haze.
(Check for light-colored edge pixels by temporarily applying shadow
and previewing each of its default directions in sequence.)
And there you have it--finis! :-)) | |||||
|
Tips and Annotations:
Other tips will follow as I
discover/remember/assemble them '-) | |||||
|
Good tubin'! liefs, Need help? Click my
sig...
 Feel free
to save this page to your hard drive for future reference. January 2008 | |||||

 If along the
way you find you've masked out a bit that shouldn't have been
removed, just surround the area with a new selection. Click
the double-pointed arrow -->
If along the
way you find you've masked out a bit that shouldn't have been
removed, just surround the area with a new selection. Click
the double-pointed arrow -->